Thursday, September 8, 2011

Where to go for camera and lens repairs...


This did not start out with the intention of being a blog post, it was much simpler than that, I had a couple of broken lenses and was looking for a place to repair them.

I have used this big "pro" services for repair services in the past but was never left with the feeling of being satisfied. I found them to be (rather) expensive, slow, and impersonal.

So when a friend shared with me his experience with MidState Camera Repair (which he had found on SportsShooter.com) I figured, why not send them in for an estimate. What do I have to lose?

The entire experience was outstanding, within a few days of them getting my lens I received a call detailing the problem, the cost of repair, and how long the entire process would take.

From the time the package left my hands until the repaired lens landed at my front door took about two and a half weeks.

It took the "big pro service" three weeks just to get back to me with their diagnosis and estimate for repair, that estimate (by the way) was twice what I paid at MidState Camera.

If you let them know you're a professional photographer (meaning you generate your income from your gear) they will make every effort to get it back to you even faster.

MidState Camera Repair is located in the quaint little New England town of Warwick Rhode Island and but regardless of where you live, you can ship your broken gear to them for an estimate.

It has been said that "long after people forget what you've did for them, they'll remember how you made them feel".

I feel great about recomending MidState Camera Repair.


Wednesday, September 7, 2011

You really need to take a look at these images...


Here are a few food images from our Flickr group and that have been entered into our latest contest.

I am blown away with the quality of the images you guys are uploading.

You have until this Friday (around noon, September 9th) to get your image in and leave a comment on a blog entry or one of our YouTube videos.

All of the contest details can be found here.


An offer just too good to pass up...


Every few months Groupon offers this great deal, a 16" x 20" gallery wrap from Canvas on Demand for just $45 (it even includes free shipping).

There has been more than one post here about why I LOVE Canvas on Demand (and have them all over my house) and why I recommend them so highly (you can read some of those posts here, here, and here).

The normal price for a canvas this size is $127, the price of $45 is a 65% savings (and a far better price than I can get even with my pro account).

An interesting fact I learned from Earl Christie was that a canvas print has a slightly wider color range than all other prints, so you will actually see more color and more details, especially in the blacks.

So sign up for Groupon and grab this great deal before it's gone!

Christmas is not that far away and I am sure someone would love to get one of your images on canvas.

Tuesday, September 6, 2011

JESSICA & MARTIN GET MARRIED!!

Once again, a huge thank you to Derrick Rice of Union Eleven for capturing these amazing images of Jessica & Martin's ceremony and reception at The Westin Ottawa. Viva always has such a great time working with Derrick, The Westin, and the many other vendors who helped make Jess & Martin's dream day come true... All Seasons Weddings, Flowers Talk, Mikaza, Wedecor, The Cupcake Lounge and Quality Entertainment. Enjoy!


Friday, September 2, 2011

Review of Strobist DVD "Lighting in Layers"...


This is one of those reviews that is difficult for me to write, because I want to make sure you understand what an outstanding piece of work this is, but am fearful it will simply come across as a big David Hobby butt kissing love fest.


There is a lot to like about "
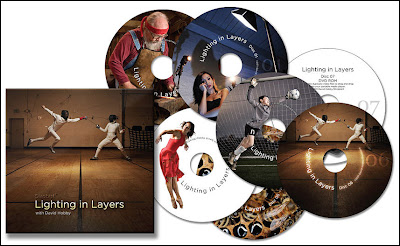
Lighting in Layers", starting with the price, it's only $159 for a hard copy or $99 for the download.


Yes the price is low, but the value and quality of the content is high, very high. You will be getting 7 discs full of 9 hours of non-stop learning, no wasted time, no fluff, no filler (6 DVD's are "Lighting in layers", the 7th disc is the complete seminar in a lower res format that can be loaded on a portable media player). Though you are getting hours and hours of video the segments are relatively short, ranging from just 5-20 minutes long, so you attack it in small, manageable, easy to digest bites.


The DVD starts out teaching us the basics, shooting with just Window Light:


Then shows us how to shoot with a single flash (key light) and a window (fill light):


Then shooting with a flash only:


And from here is where it really takes off, with David showing us how to "Light in Layers", how to properly use of the building blocks of light, where to add light, in what order to add them, in shooting scenarios that become more challenging, more demanding.


He does it with a combination of easily accessible (and inexpensive) gear and many DIY alternatives (like aluminum foil reflectors, spaghetti box snoots, and Home Depot clamps). In fact you can see the complete list of gear used for each of the shoots.


Not only is "Lighting in Layers" affordable, it will teach you how to light affordably as well, all while giving your client the best possible product.


It is NOT meant to be a cookie cutter lighting recipe, it is meant to teach us how light(s) impact our subject.


There are six full shoots in total, all start at the very beginning - understanding the location, what the end result needs to be and how it will be lit. It then proceeds to actually setting up the equipment and then shoot and all that comes with it (the adjustments, changes, etc.). Five the the shoots are "on the road" assignments, and all are very different and provide a unique lighting/learning opportunities.


During each there are three different conversations going on, David is talking to (
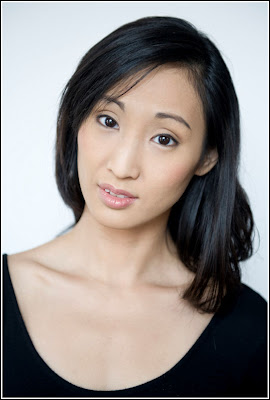
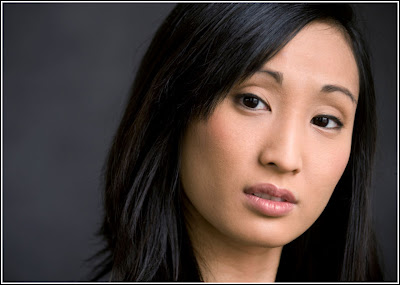
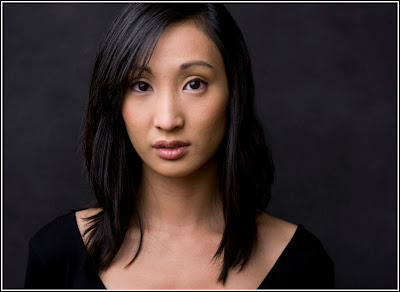
and teaching) us the viewer, he is talking to the model(s) (learning how to talk to/guide a person you are shooting is so important), and he is talking to his VALS (voice activated light stand, aka lighting assistant).


I really like the fact that as he presses the shutter the images appear immediately on the screen, even the clunkers, this makes it so much easier to follow the process and make the connection between what he is doing, the setup, and the image it produces.


Speaking of clunkers, there are times that David comes into a shoot with an idea, or tries something that doesn't work or needs to be changed and we get to see it (and he shares it) all, because that's what happens in real life and it's an important to learn how to adapt.


Each session wraps up with the "Lighting Notebook", David lays out a blank piece of paper and steps us through the lighting diagram, reinforcing what we just learned, which I found valuable.


And no opportunity is lost when it comes to teaching, there are a handful of studio shot "mini lectures" where Mr. Hobby challenges the viewers to figure out how it is lit, so we are learning from what he is saying, and learning to recognize how a scene is lit. "Deconstructing" is a pretty good learning tool. At the end of the lecture the camera zooms out, the lighting is revealed (and explained).


I was pleasantly surprised about the inclusion of the business aspect of photography (just wasn't expecting it), David has started a new local blog called HOCO360, a visual journal for Howard County Maryland, and he walks us through the decisions he made when setting it up, selecting assignments, client relations, and much more. So if you are looking to start your site, or improve the one you already have there are some real gems to learn from here too.


I also learned David is a funny guy, has a phenomenal sense of family, of community, and makes decisions based on "doing what is right". The kind of person you would want to have lunch with.


Well, his butt should be sufficiently wrinkled from all my kissing... but seriously, if you ever struggle with lighting, or simply don't shoot certain things because of a lack of confidence or know-how please invest in yourself, invest in your photography by purchasing (and watching) "Lighting in Layers", you will learn much from it, I did.


Thursday, September 1, 2011

Today only - Lightroom 3 for just $149!!...


If you've been on the fence about getting Lightroom 3, you can jump off now and get yourself the full version (either Windows or MAC) for just $149 over at Adorama (shipping is free too!).


But you won't have long to to think about it because it's a one day sale that ends at midnight tonight (September 1st), so time is (very) limited.


Below is a video from Terry White, Lightroom teacher extraordinaire, in it he shares his five favorite things in Lightroom 3.


Another Lightroom learning resource is from the kind folks at NAPP, they have put together their very thorough (full of videos & links) Lightroom 3 learning center.


Wednesday, August 31, 2011

JESSICA & MARTIN - SNEAK PEEK!!

Jessica & Martin were married at The Westin Ottawa in what was a truly breathtaking ceremony and a fun, fun, fun reception! Deciding to have their formals taken before the ceremony, Derrick Rice of Union Eleven captured the moment they saw each other for the first time on their wedding day. Want to see more? You're in luck! More of Jess & Martin's amazing images coming soon!