Not funny ha ha, more like amusing... but I get far more emails sent to me than comments left on the blog.
And the latest batch (of emails) have been asking how I made lighting diagrams like the one in yesterdays (and other) posts.
You have several options:
The first is from Kevin Kertz, he put together a layered .psd file that allows you to add, delete, and modify commonly used lighting components and is really easy to use.
He put it together in 2006 so some newer photography wiz bangs and oohh la la's will not be available to you. If you hit this link the download will start.
The second option is newer, in color, does include some of the newer wiz bangs and oohh la la's and is from QH Photography. Not only is this one newere, you also get the option of a Photoshop and/or a Photoshop Elements version. You can download them both at this link.
Lastly, if you have an iPhone (iPod touch, or iPad) you should consider downloading the Strobox lighting diagram app. This one allows you to document your lighting setup while on location.
All three are free and come in handy for documenting a lighting setup that can be referred back to at some time in the future.
Saturday, October 9, 2010
Friday, October 8, 2010
Lighting setup for the model shoot...

We used three lights for this shoot, but really only one was used to lite our model.
For all the shots that had our model standing we used a three light setup, the two lights on either side were large softboxes that were used primarily to lite the white wall behind her (with the intension of blowing it out). We used a beauty dish with a diffusion sock to lite the model herself.
One thing I would do differently is to put something between the side lights and the model as there was a bit more spill than I would have liked. In his 3 day seminar Zack Arias showed how to used some very inexpensive folding doors from Lowes or Home Depot for this exact purpose.
You can still buy (and download) the video files from this seminar for an incredibly reasonable price ($129) here. You can read here why I think it's one of the two most important things you can buy if you are serious about photography.

All of the images shot in the red "pleather" bench were shot with just a beauty dish and diffusion sock. We used a piece of Rosco Cinefoil as a "visor" on the side of the beauty dish closest to the wall, it acted as a flag (or gobo) to keep light from spilling onto the white wall.
There was a comment on yesterdays post asking about a DIY beauty dish, you can read our post and see sample images of the beauty dish I made here, you can also watch our YouTube DIY beauty dish video here.
Below is an outstanding video Mark shot in between running around as my lighting assistant, he did a great job at both tasks. Watching it will also give you a better look at our lighting setup.
If you are a subscriber you will need to return to the blog to watch it as videos (still) don't get pushed through with your ubscription.
Thursday, October 7, 2010
Model shoot with Bogdana...
We had the pleasure of shooting with Bogdana for the first time last week, and will be shooting with her again today.
The images below are all essentially one light shots. The images shot on the red seat were lit using just a beauty dish (and diffuser sock), the images with the white background did have three lights, but two of them were used to light the white wall behind her and just the beauty dish was used to light Bogdana.
I will post more about how we lit Bogdana along with a video of the shoot either later today or tomorrow.
(click on any image to view larger in a new window)


The images below are all essentially one light shots. The images shot on the red seat were lit using just a beauty dish (and diffuser sock), the images with the white background did have three lights, but two of them were used to light the white wall behind her and just the beauty dish was used to light Bogdana.
I will post more about how we lit Bogdana along with a video of the shoot either later today or tomorrow.


Tuesday, October 5, 2010
We have another contest winner...
We can't do this for every contest... but will one more time.
Because Miguel was the first to congratulate our latest contest winner I wanted to reward him for being such a "gracious non-winner".
We will be sending him 4 SlimLine "AA" battery caddy (you read our original battery caddy review here).
Be sure to check out Miguel's Flickr stream here.
Congratulations Miguel!

A cool Lightroom trick from Kevin Kubota...
I have received several emails recently asking how to synchronize images in Lightroom when multiple cameras were used but their clocks were not sync'd beforehand.
So here is a previous post that will walk you step by step through the process of synchronizing those images, it works perfectly, I know because I have used it (more than once) myself.
If you've ever shot an event with more than one camera and/or more than one photographer and forgot to synchronize the time on the cameras, then you've lived through the nightmare of trying to get all the images in their correct chronological order.
The last wedding I shot with Stacey Kane involved 4 cameras and well over 5000 images!
Getting that many images "chronologically correct" can be problematic (but extremely important). I learned how to synchronize my images from Kevin Kubota and I'll share that "trick" with you now.
If you're at an event and suddenly realize that you forgot to synchronize the time on your cameras, do the following:
1. Take a shot of an inanimate object (like your foot) with each camera, be sure to fire the cameras at the same time
2. You now have "sync" images
3. When you bring the images from that event into Lightroom you will use these images to get all the images in order
But what if you don't realize until the next day that your cameras wheren't synchronized, then what?
4. Look for a key point in time (such as "the kiss" during a wedding, because everyone shooting the wedding will capture that precise moment)
5. While in the Library mode (in Lightroom) you will select (highlight) one reference image from each camera used (the picture of your foot, the kiss at the wedding, or whatever key point image you have chosen as your reference)
6. You will pick (in your mind, not Lightroom) one camera as the "Master Camera" and the reference image from that camera will be your "Master Image", the images from all other cameras will be adjusted to match the master image
7. Write down the "time shot" for the "Master Image" (you'll need it later)
8. Go to the "Metadata" browser window in the left panel
9. Select the "Camera" sub-menu and beneath it you will see all of the cameras used
10. Select the secondary camera in the "Camera" sub-menu
11. Just the images taken with that camera will be displayed (included highlighted image you selected before)
12. Select all that cameras images ("CRTL + A" for Windows or "Command + A" for MAC)
13. From the top menu select "Metadata" then "Edit capture Time"
14. The "Edit Capture Time" dialog box will be displayed, along with your reference image
15. Remember the time you wrote down from your Master image? Write that it in the "Correct Time" box and select the "Change All" button
All of the images shot with the secondary camera will be adjusted accordingly and all your images (from both cameras) will now display in correct chronological order.
If you shot with more that two cameras you will select one reference image from each camera (step 5), then follow steps 10 through 15.

Monday, October 4, 2010
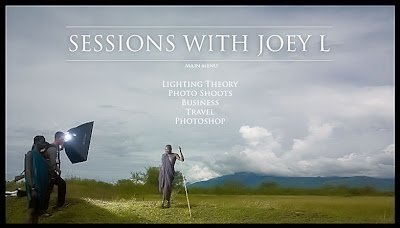
Who wants "Sessions with JoeyL"?...
Yup, just found from Joey Lawrence that he is donating a copy of "Sessions with JoeyL" as the prize for our next contest.
How cool is that?
The contest will be starting October 15th, we will post the details soon.
How cool is that?
The contest will be starting October 15th, we will post the details soon.

Saturday, October 2, 2010
The work of which I am most proud... again...
 Robert N. Dechene, 23 / Army – Tour of duty 7/16/67 – 9/17/67
 Raymond A. Borduas, 20 / Marine – tour of duty 5/5/68 – 6/4/68
This story was originally posted when I first started this blog, and because of the significance of the work (to me) and the dramatic increase on folks visiting this blog I wanted to dust it off for more people to see.
Of all the work (photographically) I have done, these two images are what I am most proud of. Though they may have little to do necessarily with photographic skills, the families (and fellow veterans) think them to be wonderful “pictures”.
I was a green beret (special forces) at the end of Vietnam, so the fact that seven boys (literally, boys) from this small town in southern Maine where I call home never returned is of significance to the people who live here.
After more than 30 years (and for the first time) I finally visited the Vietnam War Memorial. While there I took a picture of the panels that hold the names of these two of young men.
Here is a (very abbreviated) overview of what I did In Photoshop:
1. Burnt all but their names so they were pushed to the background but still viewable
2. Painted their names white to make them stand out
3. Took one of their old pictures (scanned it) and converted it to digital
4. Combined their old photo with the photo of the wall that bore their name
It was difficult at times working on these images, having these young men literally “looking” back at me… and at one point the Pink Floyd song “Wish You Were Here” came on the radio… I will save you the details; suffice it to say I was glad no one else was at home.
Then it came time to give them to the families. Roberts family had been told something was going to be delivered to them, all of the family and friends in the area had gathered at the house and were waiting… after they passed the picture around several times and looked at it for awhile, they all climbed in their cars and headed to the nursing home where his mom now resides, so she could see it.
Rays family was equally as grateful; his brother has been to my studio more than once to thank me.
I did not do these for praise or recognition, but because these boys deserve to be remembered and I wanted to do my part to make sure that happens.
Subscribe to:
Posts (Atom)